Cloud Levels

// Exploring IT one level at a time…

Tag: Microsoft

  • Using Azure Availability Zones to improve your Azure redundancy

    Using Azure Availability Zones to improve your Azure redundancy

    What is an Azure Availability Zone?

    Azure Availability Zones are a great way of providing redundancy for Azure resources.

    Each Availability Zone (AZ) essentially contains physically separate Azure datacentres. Every Availability Zone has independent network infrastructure, power and cooling.

    The majority of Azure regions provide and support Availability Zones (AZs). Generally speaking, every Azure region will have a minimum of two Availability Zones, and each Availability Zone has a minimum of one datacentre.

    Although, most regions have at least three Availability Zones and each Availability Zone has multiple datacentres (DCs), but some regions can be different so I always recommended to check what is available in your chosen region before the solution is designed.

    For example, correct at the time of writing, Availability Zones are available in the UK South region but Availability Zones are not available whatsoever in the UK West region.

    Typically, Availability Zones are generally labelled Zone 1, Zone 2 and Zone 3.

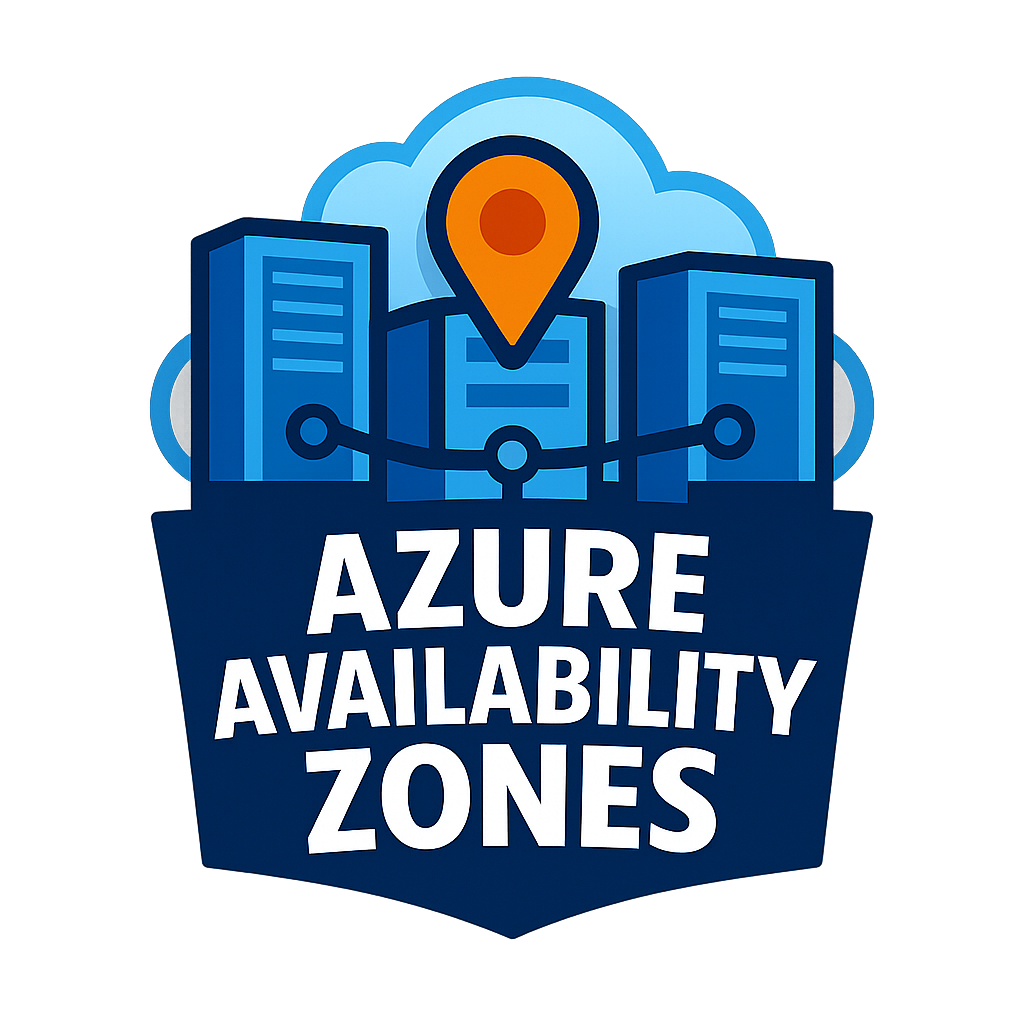
    The above graphic has been created to help visualise the physical architecture and how regions, Availability Zones and Datacentres fit together.

    Availability Zone design considerations & examples

    Which Availability Zone and how many you actually choose to utilise will depend on the redundancy requirements at the time of design.

    To be able to provide some examples let’s assume we have an Azure Virtual Machine (VM) located in the UK South region called VM1.

    First example, the business requirement is to ensure VM1 is protected against a zone failure within the UK South region. To ensure this requirement is achieved, the VM would need to be deployed to at least two Availability Zones which would in turn create the multiple VMs required within each zone, this is also known as a zone-redundant resource (a resource available within Availability Zones).

    Let’s say VM1 was deployed across two zones, Zone 1 and Zone 2, this means the resource is protected from a complete zone failure. E.g. all datacentres fail within Zone 1 the resource will still be available via Zone 2.

    Second example, the business requirement is to ensure VM1 is protected against a single datacentre failure within the UK South region. To ensure this requirement is achieved, at a minimum the VM would need to be deployed to one Availability Zone, this is also known as a zonal resource (a resource available from only one Availability Zone).

    However please note, this would not meet the definition of high availability in the same way as using multiple Availability Zones does, as a zonal VM runs only in a single datacentre and would not automatically continue to be available if the datacentre was to fail.

    The primary difference with a zonal VM in a single Availability Zone, versus a standalone Virtual Machine in Azure, is there are automatic recovery procedures in place which will attempt to recover or redeploy the VM on a best effort basis within the single Availability Zone.

    So let’s say VM1 was deployed to Zone 1 only, if the datacentre hosting the VM failed within Zone 1, Azure will attempt to recover or redeploy the VM within the same Availability Zone on a best effort basis. Naturally, a small window of downtime would exist whilst the VM is being recovered.

    However, with a Zonal VM when compared to a zone redundant VM, if the entire zone failed, then the resource would not be available as it is only located in one Availability Zone.

    In summary, the differentiator here for a zonal VM versus a zone redundant VM would be the business requirements and need for high availability, as the only way to achieve true “always on” high availability for Azure VMs is to have them deployed across multiple Availability Zones.

    Screenshot above is an example from the Azure portal, showing an Azure VMs configuration, which has only been deployed to one Availability Zone.

    Please note, resources located in an Availability Zone still benefit from protections against smaller localised issues, i.e. each individual resource located in a specific datacentre is still protected against rack failure.

    The Availability Zone service itself is free of charge to utilise which includes bandwidth costs within the same Availability Zone. Please note, if you deploy an Azure VM to multiple Availability Zones, multiple VMs will be created and you will be charged for each VM individually. For example, if you create 1 x standard D4s v3 VM and deploy it to three Availability Zones, three VMs will be created and billed to the subscription.

    Network bandwidth between different Availability Zones is also chargeable. Correct at the time of writing, network traffic flowing between different availability zones within the UK South and UK West regions (egress and ingress), is charged at £0.008 per GB. This applies to traffic between any VMs, for example, if you had two VMs in the UK South region but one was in Zone 1 and the other in Zone 3, if these VMs were to communicate with each other the above charges would apply.

    Availability Zones (Zone 1, Zone 2 etc) for the same region will also vary between different subscriptions in your tenant, this is due to the logical mapping that occurs during the subscriptions initial creation, this helps Azure to balance capacity across zones whilst maintaining isolation.

    I recommend the Azure Pricing Calculator (https://azure.microsoft.com/en-gb/pricing/calculator/) to verify pricing for Azure products and services.

    Availability Zone caveats

    There are a number of other points which I feel you need to be aware of when it comes to Availability Zones (please note these are correct at the time of writing and are subject to change):

    • Trusted launch VMs are not supported within Availability Zones.
    • Availability Zones are a method to provide an Azure resource with better redundancy and resiliency within the same region only.
      • If a VM is deployed to an Availability Zone it will become what is known as a Zonal VM.
      • If a VM is deployed to multiple Availability Zones it will become what is known as a zone redundant VM.
    • Azure Public IP addresses and Availability Zones:
      • Basic SKU > not compatible with Availability Zones.
      • Standard SKU > compatible with Availability Zones and can be used with zonal and zone redundant VMs.
        • Standard SKU public IP addresses (PIPs) are available in three types, zone redundant, zonal and non-zonal.
          • Zone redundant PIPs are IP addresses which are available to a resource which is located in multiple Availability Zones.
          • Zonal PIPs are IP addresses which are available to a resource which is located in a single Availability Zone.
          • Non zonal PIPs are IP addresses which are not compatible with Availability Zones and are only to be used with resources that are not located within an Availability Zone.
          • As of 2024, Azure standard SKU public IP addresses are zonal by default, meaning they can be used across availability zones.
    • It is possible to move a pre-existing VM to an Availability Zone instead of creating a new VM from scratch. However, please note the following:
      • This process will copy and transfer the VM over to the selected zone. This requires the VM to be offline causing a small window of downtime.
      • The VM will keep the same VM name.
      • The process will mean the new zonal/zone-redundant VM will have a new virtual NIC created. The vNIC will be created with the same network settings as the old vNIC and will be connected to the source VNET and Network Security Group (NSG).
      • If the VM has a public IP address which is not compatible with an Availability Zone, the process will create another public IP address which is compatible, and will automatically assign it to the respective vNIC.
      • You will need to re-configure the new zonal/zone-redundant VM within any applicable Azure Backup, disaster recovery (DR), role based access control (RBAC) and extensions and policies (if required) as it will be seen as a new VM.
      • Once the process is fully complete and you have tested to ensure everything is up and running on the new VM, the source VM and move collection (which is created as part of the move process), can be deleted from Azure as they are no longer required.
    • Applicable when utilising multiple Availability Zones, Microsoft do not guarantee a set physical distance between facilities, however Microsoft do advise that each facility in and between zones are separated by sufficient distance to limit risk of failure due to localised natural disaster. All whilst maintaining low-latency connectivity between zones typically in single digit millisecond speeds (ms).

    Availability Zone summary

    Availability Zones should be considered during the initial solution design, ideally not added later as an afterthought, although existing Virtual Machines can be moved to Availability Zones later if required. Availability Zones are extremely useful when high availability and resiliency is required within a single Azure region.

    Use Availability Zones when:

    • The workload must remain available during a datacentre or zone failure.
    • You are designing production or mission‑critical systems located within a single region.
    • You can deploy multiple instances of a single resource.
    • An increase in cost is acceptable for much higher redundancy.
    • You want to meet SLA, compliance, or business continuity requirements.

    You may want to avoid Availability Zones when:

    • The workload is non‑production (dev, test, lab environments) and you do not require redundancy or cannot justify the uplift in cost.
    • You cannot deploy multiple instances of a single resource.
    • The chosen Azure region does not support Availability Zones.
    • The resource is already protected for disaster recovery purposes across different regions using another solution (look out for my upcoming blog post on Azure Site Recovery) and does not require regional protection.

    Hope this helps and thanks for reading!

  • Using Microsoft Entra ID authentication on an Azure Windows VM (Without AD DS)

    Using Microsoft Entra ID authentication on an Azure Windows VM (Without AD DS)

    If your environment does not have a directory service such as Active Directory Domain Services (ADDS). But you still require Microsoft Windows-based virtual machines (VMs) in Azure. Then you can integrate those VMs with Microsoft Entra ID for authentication purposes.

    This allows users to sign-in to Azure Windows Server VMs using their Entra ID credentials. Whilst removing the dependency on locally managed user accounts. From a security perspective, this provides several benefits, including centralised identity management and improved auditing.

    Prerequisites

    To ne able to enable Entra ID authentication on a Windows VM the AADLoginForWindows extension must be installed.

    This extension can be deployed in several ways:

    • Using Azure CLI or Azure PowerShell
    • During VM creation in the Azure portal
    • Retrospectively through the Azure portal

    Installing the extension during creation of an Azure VM:

    When creating a VM in the Azure portal, the extension can be installed automatically, by selecting the Login with Microsoft Entra ID checkbox during the deployment process.

    Installing the extension on a pre-existing Azure VM:

    If the VM already exists, the extension can be installed manually:

    1. Navigate to the VM in the Azure portal
    2. Select Extensions + applications
    3. Add the AADLoginForWindows extension

    Once installed successfully, the extension will appear in the Extensions & applications blade, with a status of Provisioning succeeded.

    Please note at the time of writing, this extension does not support automatic upgrades and requires manual updates when newer versions are released by Microsoft, this is shown in the example above by comparing the version and latest version columns.

    Granting Access via Azure RBAC

    Now the extension is installed, all you need to do for this to work is to grant your users the required Azure roles, however the role required depends on what permission levels your user requires.

    Two Azure roles exist for this purpose Virtual Machine User Login & Virtual Machine Administrator Login. As the names of the roles suggest, the first role provides users accounts with standard user permissions, and the second role provides the user with local administrator permissions.

    In a standard environment the above should be all you need to do to allow Entra ID authentication on an Azure VM. However in tenants with more complexity, you may find you need to complete some further troubleshooting and make some additional changes, especially if your tenant is leveraging Microsoft’s conditional access.

    Conditional Access & MFA considerations

    If you have a conditional access (CA) policy which enforces MFA, your users will need to authenticate with a strong modern authentication option, such as Windows Hello for Business.

    If a strong modern authentication option is not possible in your environment, you will need to ensure the conditional access policy which enforces MFA does not do so, this can be done by excluding the Microsoft Azure Windows Virtual Machine Sign-in application in the cloud apps exclusion list in the CA policy.

    I’ve also found the legacy per-user multifactor authentication settings (if enabled) also interfere with this authentication flow, to resolve this you need to disable this for each user in the Entra ID portal, the settings captured below are available by selecting the Per-User MFA option in the users blade available within the Entra ID portal:

    Additional caveats and common gotchas:

    • To be able to use modern authentication methods such as Windows Hello for Business, the Use a web account to sign in to the remote computer option, needs to be selected within the RDP client to work successfully:

    The above setting can of course be saved to an RDP file to ensure this setting does not need to be enabled each time. You can also download a pre-prepared RDP file by using the connect option from the VMs properties in the Azure portal.

    • The device the user is signing in from needs to be either an Entra ID Joined, Entra ID Hybrid Joined or Entra ID registered device. Otherwise, you’ll see sign-in errors at the RDP sign-in prompt, likely to be a generic error saying The logon attempt failed.
    • When authenticating from a device which is Entra ID registered, every time a user authenticates with the RDP client they will need to specify the “AzureAD\” prefix, for example “AzureAD\username”.
    • This authentication method is unsupported, if you are logging in from another Windows Server, and your tenant has a conditional access policy which enforces access only from compliant devices.
    • To allow Microsoft Entra authentication to work on a Virtual Machine in Azure, the following networking requirements apply:

    Hope this helps and thanks for reading!

  • Configuring Microsoft Entra ID tenants in a hybrid identity model with multiple AD DS forests

    Configuring Microsoft Entra ID tenants in a hybrid identity model with multiple AD DS forests

    Overview

    An interesting challenge came my way recently, for a global firm with locations in 15 different countries, who were going through an exciting period of growth and acquisition.

    This article is going to talk about the challenge I faced with regards to the businesses hybrid identity requirements.

    But first I’d like to provide a bit of background to the project.

    The first stage of the project was to merge two separate firms and all of their offices based in the UK from an IT infrastructure perspective. This included on-premises identity, on-premise servers, cloud resources & networking.

    Both firms had different specialities however once merged these two firms would become the global firms UK division.

    The second stage of the project was to bring the UK division into the global businesses Microsoft Azure infrastructure & Microsoft Entra ID tenant. This included converting every user into a hybrid identity so they could authenticate to on-premise and cloud resources with one identity. Provide a zero touch build process for every end-user compute (EUC) device by leveraging Intune (MDM) & Autopilot.

    Due to the nature of the global business, my remit was only in relation to the UK division, divisions located outside of the UK are managed by their own respective IT teams. Therefore, the solution implemented had to only affect the UK division, whilst allowing other divisions to replicate this behaviour and functionality during their onboarding transformation projects in the future.

    The challenge

    How to use a hybrid identity model for a specific on-premises Active Directory Domain Services (AD DS) forest, with a Microsoft Entra ID tenant which in future will require other independent AD DS forests to also implement a hybrid identity model, all whilst not having any trusts or connectivity between these independent AD DS forests.

    Over the years the Entra ID Connect sync service, installed on a Windows Server, has generally been the go to option for hybrid identity sync between AD DS and Entra ID.

    However, Entra ID has a limitation whereby it cannot connect to and use multiple Entra ID Connect servers.

    Which meant this was not a suitable option in this scenario due to the lack of connectivity and trusts between AD DS forests across the globe.

    The solution

    Microsoft Entra ID Connect cloud sync.

    The primary difference between the Entra ID Connect Cloud Sync service and an on-premises Entra ID Connect server is the sync engine is offloaded to the cloud.

    This method suited this scenario perfectly as it supports multiple forests without the need for line of sight connectivity and trusts between the individual ADDS forests.

    To be able to sync to Entra ID with Entra ID Connect cloud sync, a light weight Entra ID Connect Cloud sync agent is required, this needs to be installed onto a domain member server within each forest.

    The Entra ID Connect Cloud sync service is more limited when compared to the traditional Entra ID Connect service.

    Although in my opinion the main features expected are all there and fully functional. For example the Entra ID Connect cloud sync service still allows you to have a two-way sync (AD to Entra ID and Entra ID to AD) which provides you with password writeback functionality. Entra ID Connect cloud sync also provides OU filtering allowing you to control which objects are synced from AD DS.

    For reference, if you require users to be able to change their AD DS passwords from the cloud, each user will require a Microsoft Entra ID P2 license so they are able to change their password via Microsoft’s self-service password reset solution.

    You can find the Entra ID Connect cloud sync agent installer within the Entra ID portal.

    Firstly, login to Entra ID portal (entra.microsoft.com).

    Secondly, open the ‘Entra Connect’ blade:

    Thirdly, open the ‘cloud sync’ blade:

    Fourth, select ‘New configuration’ under the Configurations blade, then select the ‘AD to Microsoft Entra ID sync’ sync direction:

    Finally, select ‘click here’ next to ‘For a list of active agents’, which will open a new menu where you can use the download option to get a copy of the agent installer:

    Further information on how to install an Entra ID Connect Cloud Sync agent is available here: https://learn.microsoft.com/en-us/entra/identity/hybrid/install

    Hope this helps and thanks for reading!

  • Intune Enterprise Application Management and its practical benefits

    Intune Enterprise Application Management and its practical benefits

    EAM – overview

    This post talks about the use of Enterprise Application Management (EAM), also referred to as the Enterprise App Catalogue, within Microsoft Intune.

    EAM is a licensed bolt on which is available for Intune licensed users. EAM provides an additional mechanism for deploying applications to users and devices.

    The image above shows the EAM option available within the Intune portal.

    The main difference with EAM compared to other deployment methods, such as Win32 or MSI deployment types, is EAM leverages a catalogue of pre-packaged applications which are created and managed by Microsoft. This means that an application deployed using EAM will always be deployed using the latest version of the respective application. This in turn means end users and devices will always have the latest version of an application reducing cyber security risks from un-patched software.

    Software deployments from Intune which leverage the Microsoft Store work in exactly the same way. However, a lot of enterprise applications are not available from the Microsoft Store, which is where EAM fills the gap by providing common enterprise applications pre-packaged and ready to go.

    Maintaining EAM applications

    Long-term EAM ensures that applications deployed from Intune can be easily updated when Microsoft updates the catalogue by providing an easy ‘update’ button.

    This function updates your application package within Intune quickly and easily.

    The image above captures an EAM application and the update function within the Intune portal.

    This update function ensures your users are not running the risk of having old outdated versions of apps deployed to corporate devices, whether automatically or manually via the company portal, also saving time waiting for the applications to update in the background after deployment on their scheduled patching cycles.

    Using EAM of course assumes the required applications are available in the EAM catalogue. However, Microsoft are always adding new applications to the catalogue, plus coupling EAM with application deployments using the Windows Store together maybe a great approach for your Intune environment.

    For reference, you can check which applications are available in the Enterprise App Catalogue here: https://learn.microsoft.com/en-us/intune/app-management/deployment/enterprise-app-management#apps-available-in-the-enterprise-app-catalog

    Licensing EAM

    To note EAM is licensed on a per-user basis, which correct at the time of writing, each license costs £1.10 per user per year. Every user still requires the standard Intune license.

    Summary

    Hopefully overall, this approach will also reduce administrative time and overhead, by reducing the time required to regularly review and update any MSI or Win32 packages with the respective applications latest version.

    Hope this helps and thanks for reading!

  • How to delete a Microsoft Entra ID tenant & caveats

    How to delete a Microsoft Entra ID tenant & caveats

    Article overview

    Hello and thank you for reading my first post!

    I have put this post together to outline some additional steps that I had to recently complete to successfully delete an Azure / Entra ID tenant. This situation arose following an acquisition which meant the tenant in question was redundant after the existing resources were migrated.

    I personally found that the additional steps required, were not mentioned in Microsoft Learn articles at the time, which under normal circumstances would successfully guide you through the deletion process successfully.

    For reference, one of the resources I am referring to can be found here: https://learn.microsoft.com/en-us/entra/identity/users/directory-delete-howto.

    Microsoft Entra ID tenant deletion prerequisites

    Before being able to proceed to delete an Entra tenant, you will need to complete (as outlined in the above guide) all of the pre-requisites, once complete they should all have a green status as shown in the below screenshot:

    This status page is available in the Entra Admin Centre (entra.microsoft.com).

    To note, for the License-based subscriptions status to pass, it took around 120 days, this was due to the licenses in my tenant being provided by a third-party reseller. Please note, licenses provided by a reseller take longer to move through each stage of decommissioning, before being removed from the tenant. This lengthy license decommissioning process essentially acts as a back stop, allowing plenty of time before any data is purged for the licenses to be re-added if needed, and in turn recovering the licensed features and data in an event of any licenses being removed by mistake.

    The blocker: Legacy Microsoft Partnerships

    However, although the pre-requisites passed as shown above, I still could not delete the tenant in question. I kept receiving the below error suggesting it was due to left-over Enterprise Applications:

    There were no Enterprise Applications left-over, the only ones I could find via Microsoft Graph were ‘Microsoft Internal’ Enterprise Applications, but due to the error message I still ended up spending a chunk of time trying to remove these as per the guidance found here: https://learn.microsoft.com/en-gb/entra/identity/users/directory-delete-howto#remove-enterprise-apps-that-you-cant-delete. However, this did not achieve anything as it turns out deleting ‘Microsoft Internal’ Enterprise Applications has been blocked by Microsoft (naturally).

    In the end I conceded and ended up raising a ticket with Microsoft Azure support.

    To my surprise I was advised that the problem stopping me from deleting the tenant, was simply due to some legacy Microsoft partnership relationships still being registered to the tenant, despite licenses being fully deleted at this stage and the error message above suggesting otherwise.

    So I got in touch with the three Microsoft partners and distributors in question and requested they removed the partner relationship. Once they had been successfully removed, a few days later the Entra tenant was able to be deleted successfully.

    Summary

    So if you’re ever in a similar situation and can’t delete an Entra tenant, I would certainly recommend you check to see if there are any legacy relationships left over, you can check these here: Microsoft 365 Admin Centre -> Settings -> Partner Relationships (https://admin.microsoft.com/#/partners).

    Hope this helps and thanks for reading!